Adding New Staff |
  
|
Adding New Staff |
|
Check the Staff defaults in Setups > B. Setups & Defaults > Defaults’ tab, these will be inherited each time new staff are added. While in setups & defaults, check the Holiday defaults on the ‘Holiday’ tab.
In ‘Setups > K.Payroll Cycles’ when you highlight a Payroll Cycle line and select the 'Details' button, a list of options are displayed. One of these options is ‘Only Regular Jobs Accrue Holidays’ and if this is ticked, only regular jobs will accrue holidays, any cover work does not accrue holidays. If a staff member only does cover type work, there is a flag on the ‘Staff > Holidays > Staff Defaults’ screen named 'Accrue Holiday on All Sites' that can override this for an employee, so all jobs accrue holiday.
In ‘Setups > K.Payroll Cycles > Pay Items’ normally only Regular Pay items like REG1 accrue holidays, so the ‘Use to Calculate Holiday Pay’ field would be checked, but not on items like Extras.
From the Main Menu, select the Staff > A. Staff Maintain then click the Add button.

***At this point you may type in the Surname and re-instate a previously employed person capturing their previous Address, Bank Details, NINO and Tax Code if you wish. The system will re-create the person BUT UNDER A NEW STAFF NUMBER***
Tip: The ‘Enter’ or ‘Tab’ key takes you through the fields in order.
There are 3 ways of numbering staff:
1. Automated next number (00123).
2. Automated next number with Branch letter (00123L).
3. Free Entry e.g. (JBLOGS) or (123).
The preferred method is 1, as this aids searching by number. Only use 2 if you have multiple branches.
To change the Numbering Convention use Setups > B. Setups & Defaults > Setups > Staff Numbering Convention.
In most cases the entry into each field is obvious, below are some with explanations.
Select the Name Tab

Status – Identifies the Status, typically Employed/Left.
Type – Defines the Type of Staff and Grade. The Grade gives Access rights to this person - what they see and do. Also Division / Area Managers / Supervisors must be declared here before they can be setup in Divisions.
There are 5 Staff Grades:
1. Cleaning Staff.
2. Supervisor.
3. Area Manager.
4. Division Manager
5. Other Managers/Office Staff/Directors.
The number of Types is unlimited. Each Type MUST be assigned one of the above Grades. To set up Staff Types, go to Setups > R. PAYE, NI & Staff Setups > Staff Type Codes.
Any CleanLink users with Rights to Staff, who log in with their Staff No. will see all Staff with a Grade lower than themselves, i.e. if the user is Grade 5 they will see Grades 1-4.
To see Grade 5 Staff, the user must be assigned the Right: 141. Access Senior Staff.
Ideally CleanLink users should log in using their Staff No. If you have office staff logging in with a User Id that is not their Staff No, unless they have the ‘141.Access Senior Staff’ Right, they will only see Staff with Grade 1. Preferably change their User Id. to their Staff No. and give the necessary Type/Grade.
If you require a user to Log on with a different User Id. to their Staff No, add a new Staff with the User's ID name. You may need to change ‘Staff Numbering Convention’ from the default ‘1 = Numeric’ to ‘3 = Free Entry’ from ‘Setups > B. Setup & Defaults > Staff Numbering Convention’ the button is at the bottom right of the screen.
Add the new Staff, say ‘TOM’ with only a Surname and save.
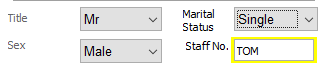
They don’t need to be paid under this name it’s just a Logon name, now give them a Type with the required Grade, and a Leaving Date before the beginning of the current Tax Year so they are not included in EOY returns.
Remember to change the ‘Staff Numbering Convention’ back. The user ID MUST be entered in UPPER CASE.
Branch – Identifies where Staff belong. See Multiple Branches.
Nationality – For information only, but a required field when inputting via CleanLink Mobile
Ethnic Origin – For information only (The codes for Nationality and Ethnic Options can be seen and edited from Setups > R. PAYE, NI and Staff Setups).
Exclude from Portal - Prevents this staff member form being sent to the CleanLink Portal when data is exported.
Exclude from Mobile - Prevents this staff member from being sent to the CleanLink Mobile app on mobile devices.
Adding Staff Photos - Staff Photo's are stored in the 'Cleanlink/Images' folder, where they should be named as the employee's staff number, eg. 01564.jpg for employee number 01564. Once these are placed in this folder, the system will automatically pick them up and display them on the staff record.
Adding Tax Details
Select the Tax Tab

You should have a basic understanding of payroll to operate pay; a good starting place is https://www.gov.uk/paye-for-employers
National Insurance No. - The Staff Member's National Insurance Number.
Table Class - Hit F5 and choose the correct National Insurance Table Class.
Tax Prefix / Tax Code / Tax Suffix / W1M1 - Tax status.
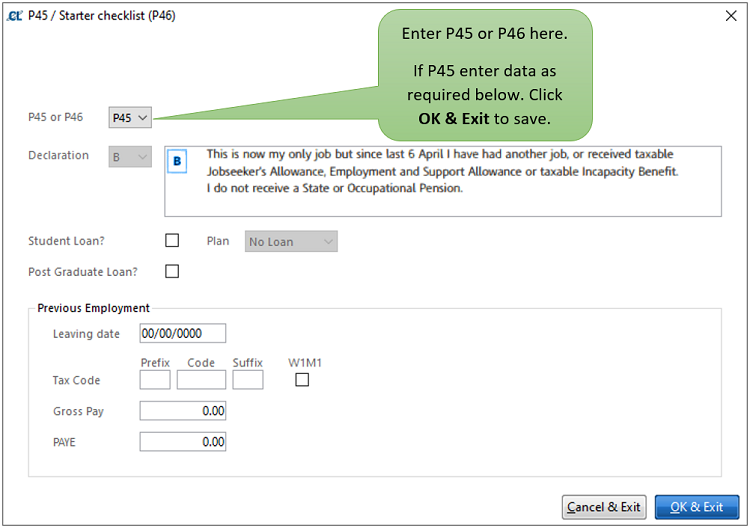
If you have received a P45 or P46 from the employee enter the details in the relevant fields on the ‘Tax’ and ‘Previous’ tabs. By pressing the ‘Save’ button you will be taken to the In Year P45/46 entry screen which is described in full in the ‘In Year Filing’.
By default all new employees inherit the Tax Code, Table Class, Tax Suffix and W1M1 as set up in ‘Setups > B. Setups and Defaults > Defaults’ tab:
Payroll – Staff are on a Pay Cycle No. i.e. Weekly/Monthly/Fortnightly/4 Weekly.
Last Wk / Mth No. – Defaults to the last completed Cycle for the pay cycle you have selected.
Department Code – Pay is analysed by departments, create the number of departments that
your accounts package requires.
DOB - Date of Birth.
Start Date / Leaving Date - Start and End of employment.
Director / Pro Rata Director NI / Weeks Left in Yr (Director) -
SSP Qualifying Days – Statutory Sick Pay defaults to 1, Sun to Sat pattern NYYYYYN.
Work Permit Expires – Pay Anomalies report warns if expiring within 30 days and the Warnings screen shows date of expiry.
Permit Extended to – You can input the extended to date in the Permit Extended To field. Pay Anomalies report warns if expiring within 30 days.
Student Visa / Type - Select to indicate the Staff Member has a Student Visa.
Workers Reg. Scheme Ref. – From May 1 2004, most nationals of the new member states (except Cyprus and Malta) who wish to work for more than one month for an employer in the UK need to register under the Worker Registration Scheme.
CRB / CRB Date – Criminal Records Board check. Allows tracking, processing and approval of CRB checks and input of a ‘filed’ date.
Agree to over 48 Hours – Check if the employee has agreed to work more that an average of 48 hours a week. This relates to the EU Working Time Directive.
Night Time Worker – Check if the employee works at night. Information only for health and safety purposes.
TUPE Transfer – Check to show that employee is a TUPE transfer and enter a start date
Apprenticeship Start and End Dates - Start and End Date of Apprenticeship
Payslip Required – Tick to generate a payslip (only necessary if site details are not already set up to produce one for all site employees). Select in the box to choose whether you want this to be sent via Post, Email or SMS.
Hours Rate Pay Rate 1 / Pay Rate 2 / Pay Rate 3 – It is often preferable to use Site Rates and leave these fields blank. Pay rates can be entered in 4 different places. When the system looks for an hourly rate to apply, it first looks in the ‘Individual Staff at Site rate’ if this is empty it looks in ‘Staff rates’ if empty it looks in the ‘Site rates’ and if this is empty it will use the ‘Company rate’.
If you have no pay rate policy we recommend using Site rates (3 below).
The hierarchy of rates:
1. Individual Staff at Site rates
2. Staff rates
3. Site rates
4. Company rate.

Adding Bank Details
Select the Bank Tab
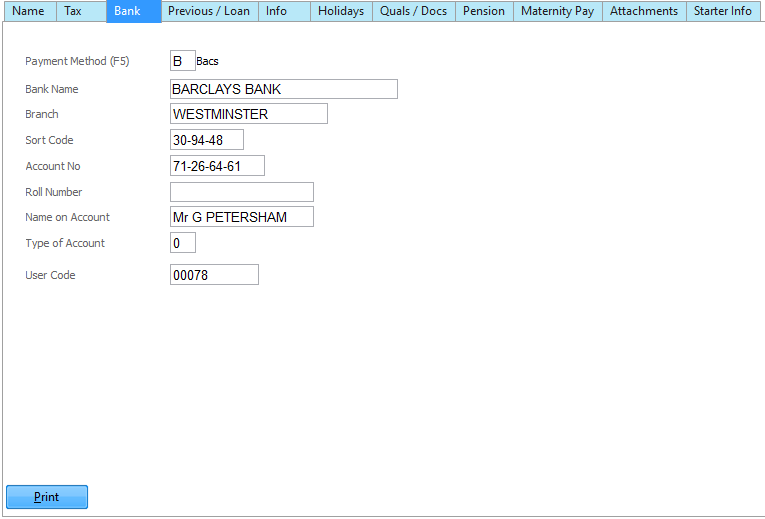
Payment Method - Select the method used for Staff payments.
Bank Name / Branch / Sort Code / Account Number / Roll Number - Bank account details of the Staff Member.
Type of account – Some banks require this, rarely used.
User Code - Used on Printed BACS report, supplied by your BACS service provider
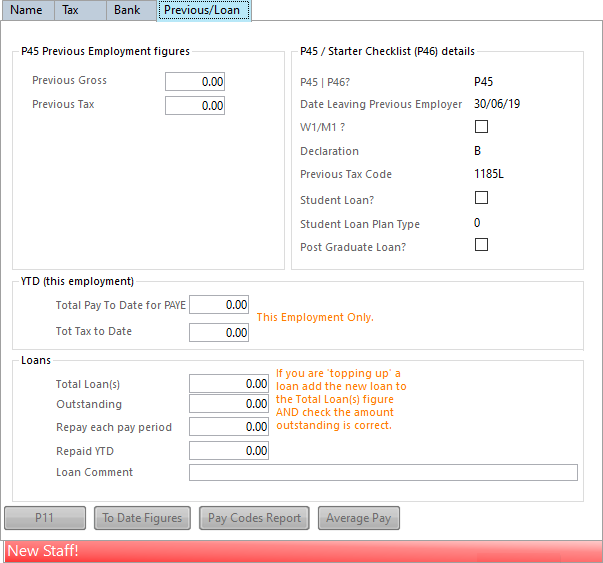
Previous Gross and Tax - Enter from P45 using .
YTD Total Pay and Tax to Date – Normally never enter or change these figures as derived from
processed data.
Loans – Used for automatic loan deductions up to a balance figure, such as season tickets.
Shows running totals for Outstanding Balance and Amount Repaid, see here for details on how to add a loan.
P11 – Can be used to view P11 details at any time.
To Date Figures – Can be used to view P14 ytd figures up to last pay cycle update.
Once finished, click Save.
For more options configuring Staff Members, see Managing Staff.