User Defined BACS |
  
|
User Defined BACS |
|
User Defined BACS Formats
CleanLink Site Manager has a number of pre-set BACS formats covering the major banks. However, it may be that you move to a bank which uses a format that is not on the current list in which case you can define a new format to meet their requirements.
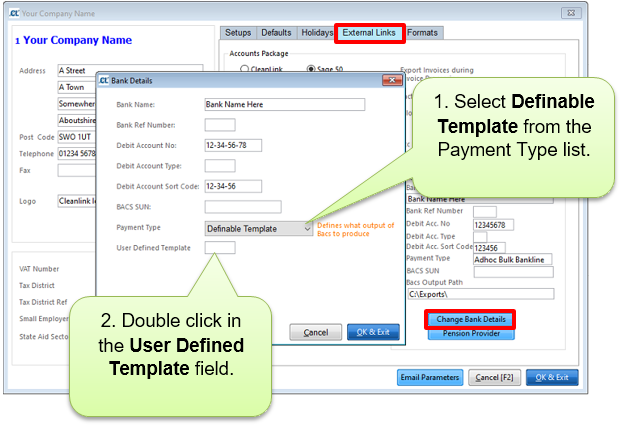
To create a new User Defined BACS format navigate to Setups > B. Setups and Defaults > External Links and select Change Bank Details.
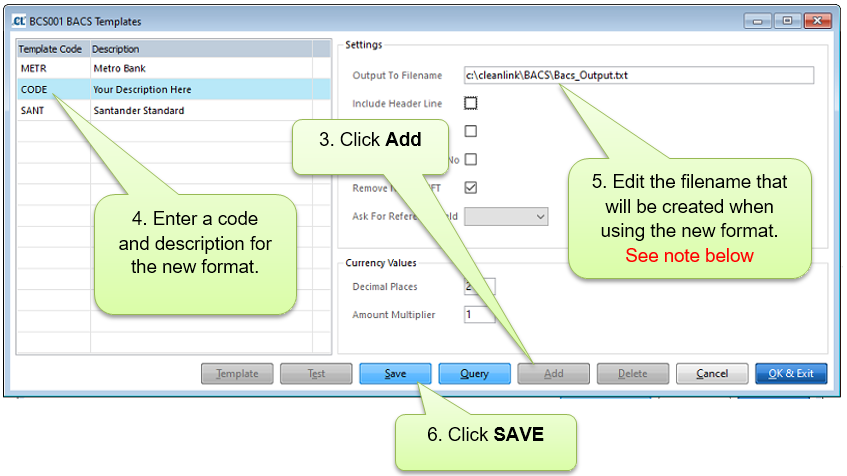
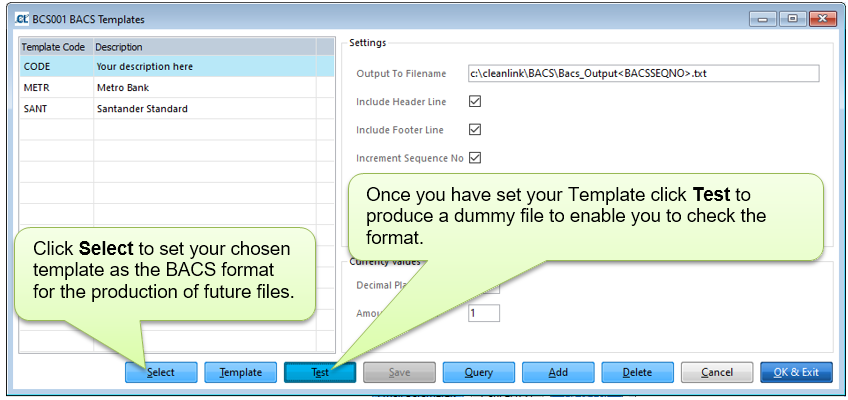
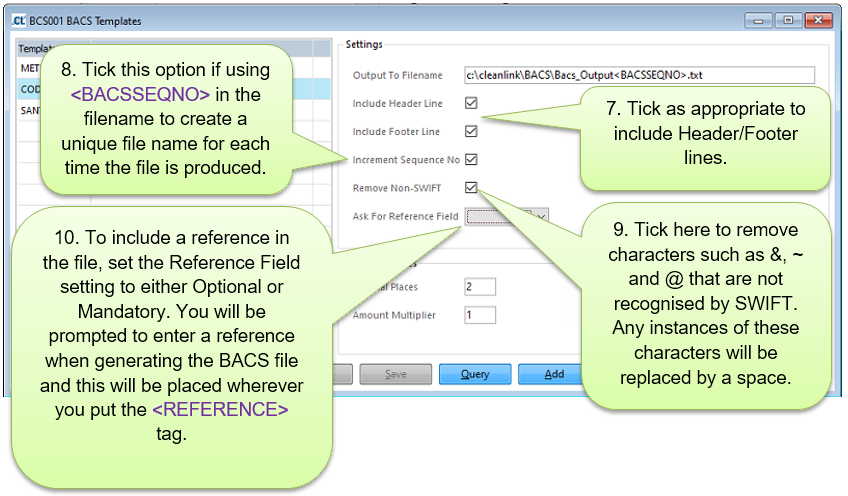
Note: If you need a unique filename, add either <BACSSEQNO> or <TODAY> into the Output to Filename field. These will be replaced each time the extract is run. Please ensure the file type is correct for your bank’s requirements (common types are .txt and .csv).
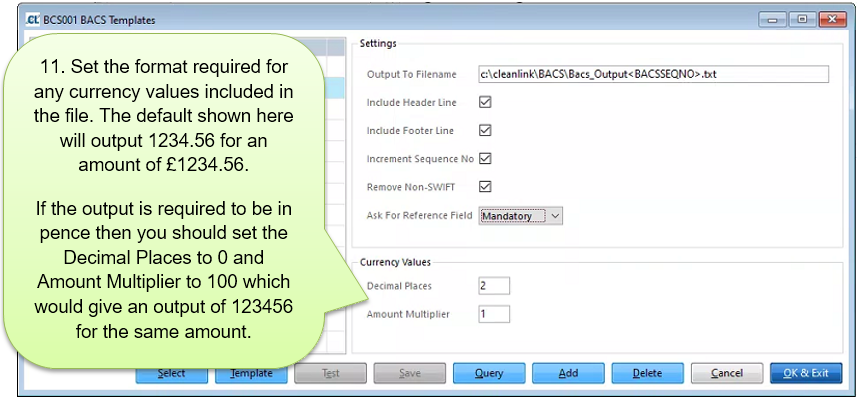
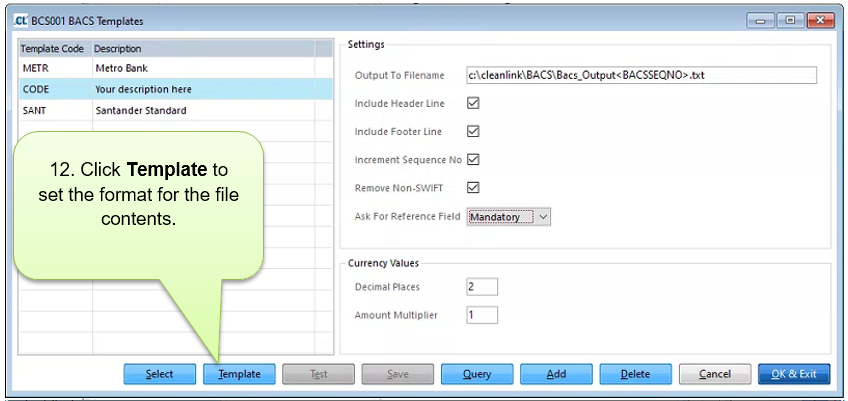
Setting the file contents
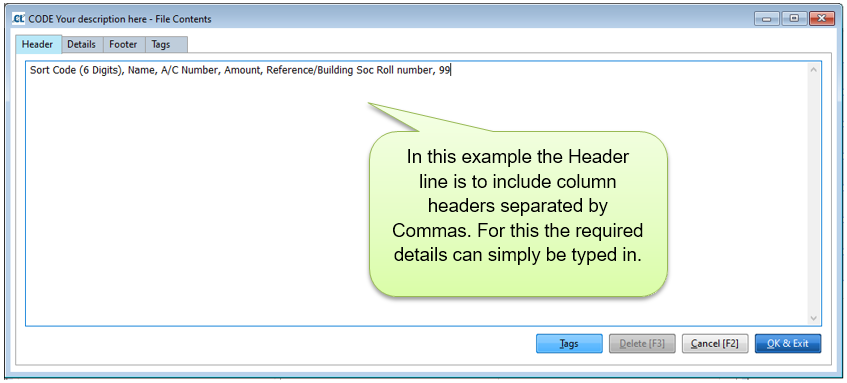
BACS files can include up to three different sections depending on your bank’s requirements. For example, some formats use a Header line that includes information such as the debit account details, payment date and a reference whilst in other formats this information would be repeated on each line of the Details section. Some formats also include a Footer line with details such as the total amount to be debited. Your bank should be able to provide a document detailing what is needed in each section for a successful BACS payment.
The available Tags are as follows:
<BACSHASHNO> - Creates a unique BACS Hash code if there is a BACS SUN code listed in Setups > B. Setups and Defaults > External Links > Change Bank Details.
<BACSSUN> - Outputs the BACS SUN from Setups > B. Setups and Defaults > External Links > Change Bank Details.
<BACSSEQNO> - An accumulating number showing how many times the format has been created. Used in conjunction with the Increment Sequence Number flag.
<CPYACCNO> - The Debit Bank Account Number from Setups > B. Setups and Defaults > External Links > Change Bank Details
<CPYNAME> - Company Name, taken from Setups > A. Companies.
<CPYSORTCODE> - The Debit Account Sort Code from Setups > B. Setups and Defaults > External Links > Change Bank Details
<PAYAMOUNT> - The Net Pay for the employee in the relevant pay period.
<PAYCOUNT> - The number of employees to be paid.
<PAYCYCLENAME> - The name of the pay cycle that the file is being produced from. Taken from Setups > K. Payroll Cycles > Description.
<PAYDATE> - As entered when creating the BACS file.
<PAYGRDTOTAL> - The total amount of all payments in the file.
<REFERENCE> - A reference manually entered when creating the file.
<STFACCNAME> - The staff bank account name from Staff Maintain > Bank > Name on Account.
<STFACCNO> - The staff bank account number from Staff Maintain > Bank > Account No.
<STFACCTYPE> - The staff bank account type from Staff Maintain > Bank > Type of Account.
<STFADD1> - Line 1 of the address in Staff Maintain > Name
<STFADD2> - Line 2 of the address in Staff Maintain > Name
<STFADD3> - Line 3 of the address in Staff Maintain > Name
<STFADD4> - Line 4 of the address in Staff Maintain > Name
<STFID> - The staff number for the relevent employee.
<STFNAME> - The name of the relevant employee.
<STFROLLNO> - The Building Society Roll Number (if used) from Staff Maintain > Bank > Roll Number.
<STFSORTCODE> - The staff bank Sort Code from Staff Maintain > Bank > Sort Code.
<STFUSERCODE> - The staff User Code from Staff Maintain > Bank > User Code.
<TODAY> - Outputs the current date.
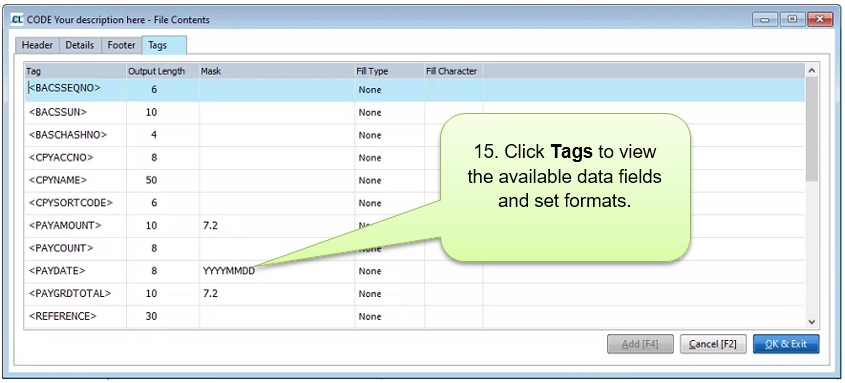
Output Length – How many characters are used for the selected data tag.
Mask – The format for the selected Tag. For example, date tags could be formatted either as DDMMYYYY or YYYYMMDD, sort codes could be UUUUUU or UU-UU-UU. Please ensure that the Output Length is appropriate to the chosen Mask.
Fill Type (Right/Left/None) – In many cases the actual data will not completely fill the allowed Output Length and the Fill Type tells the system what to do with the remaining characters. “Right” will fill the space with your chosen Fill Character at the end of the data, “Left” will fill the space in front of the data, and “None” will use only the characters required before proceeding to the next field. Warning: Using the incorrect Fill Type could lead to errors in pay amounts that may not be instantly picked up. For example, if the pay amount is to be given in pence using an output length of 7 characters there is a big difference between £123.00 being converted to a left fill (0012300) and right fill (1230000 or £12300.00)!
Fill Character – Defines which character will be used if Left or Right Fill are selected. The most common character to use here would be “0” or leave blank for a space.
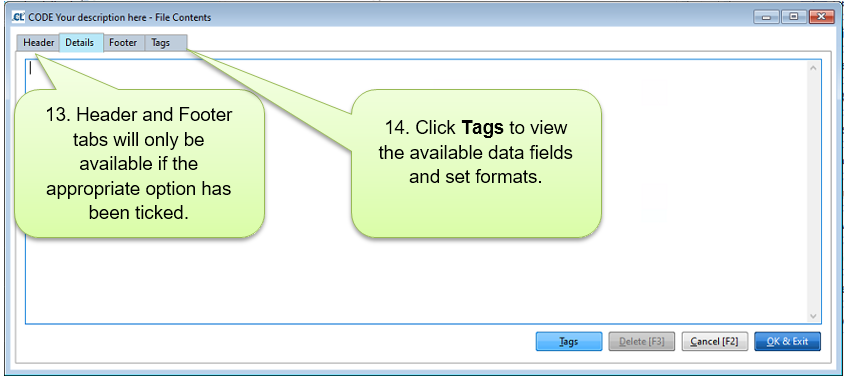
To set the format for the required sections of your template select the section and enter the required details as below, remember that not all formats utilise a Header or Footer section.
Example Headers


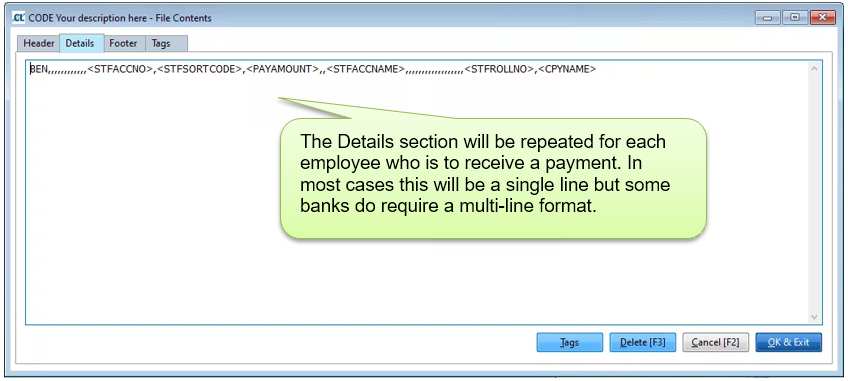
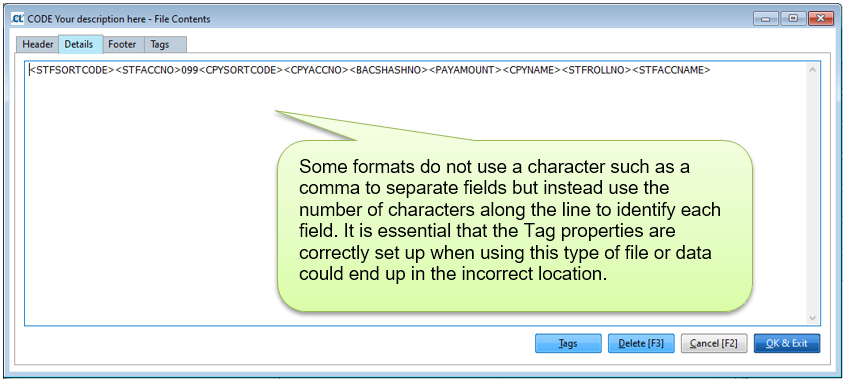
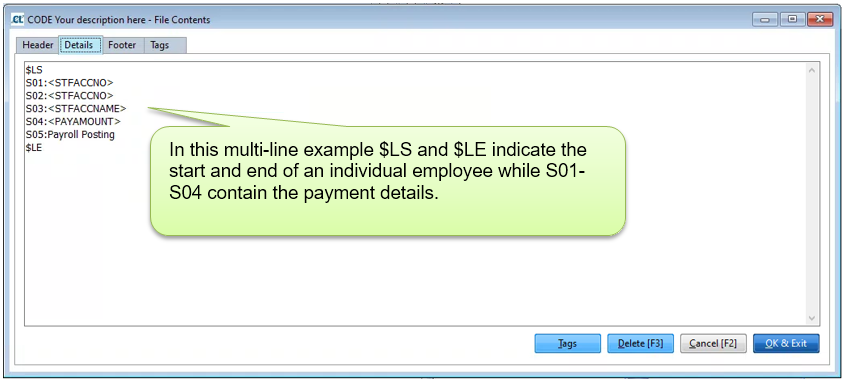
Example Details
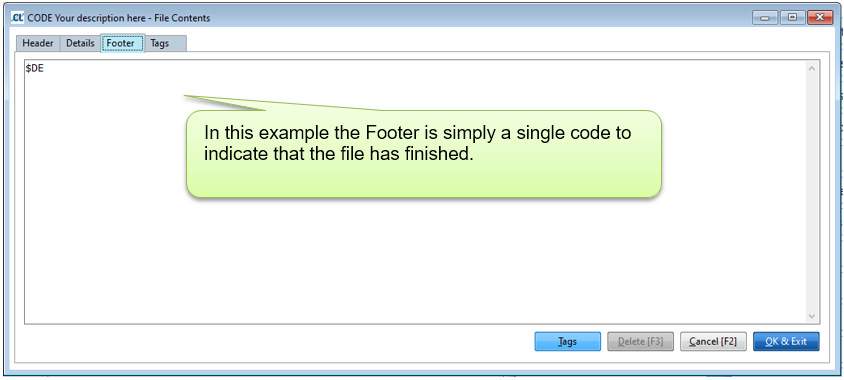
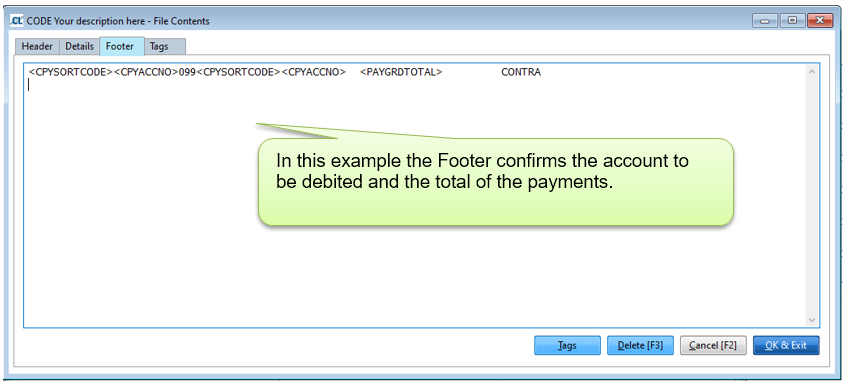
Example Footers