Payroll Setup |
  
|
Payroll Setup |
|
The following section is a step by step guide for setting up the main payroll setups. This section includes the following headings:
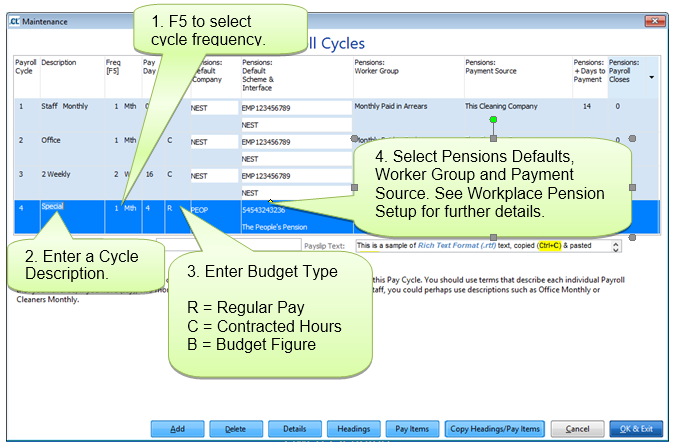
To setup a new payroll cycle go to Setups> 11. Payroll Cycles. Click ‘Add’ and complete the details as below:
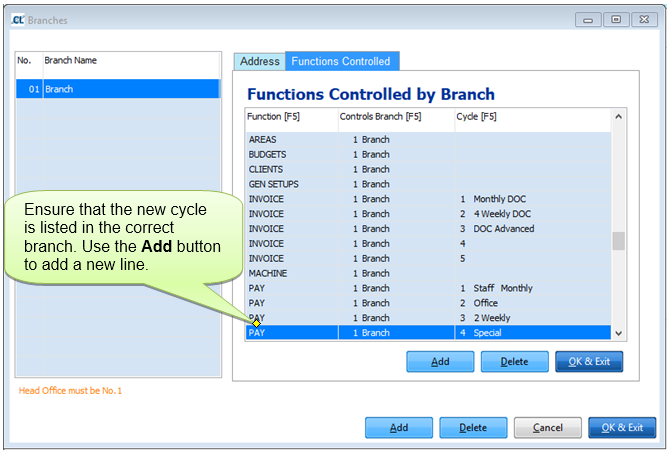
To setup who controls the new Payroll cycle go to Setups> 3. Branches> Functions Controlled
To setup the periods for the new cycle go to Setups> 16. Event Calendar> Pay and select the first week the new cycle is to begin and press F5 on your keyboard

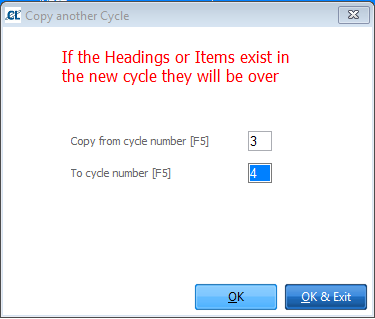
Once you have complete this, go back into Setups> 11. Payroll Cycles and select the newly created cycle then select the Copy Headings/Pay items button
Once this is complete select Pay Items and check that you have all the ones you need.
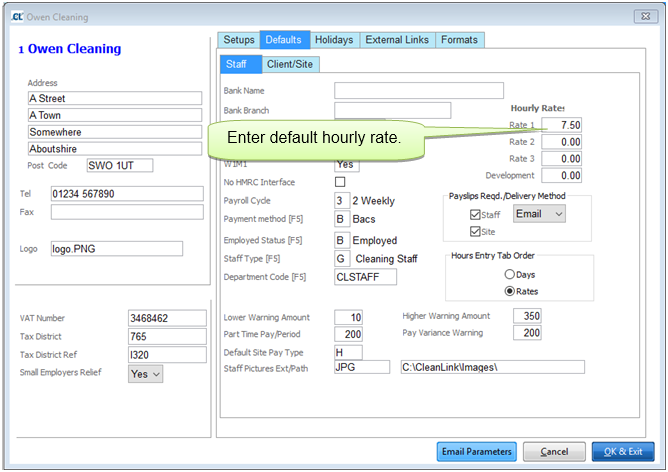
Set up the Company default hourly rates to the minimum wage rate by going to Setups> B.Setups and Defaults> Defaults Tab> Staff Tab, this is a fall back value if no other rate exists.
Pay rates can be entered in 4 different places. When the system looks for an hourly rate it looks in the order of the hierarchy of the Pay Rates.
Below is a list of these rates and where they are located:
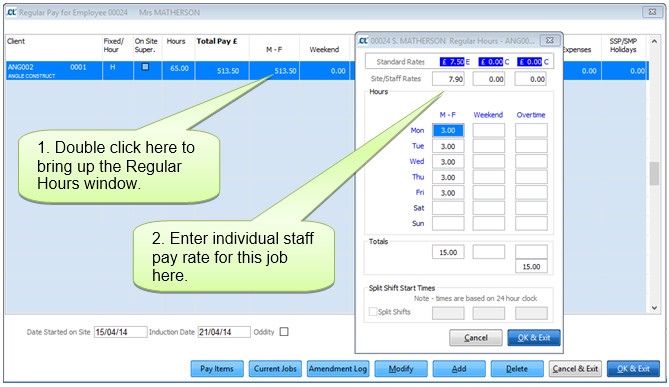
1.Individual Staff at Site Rates - Staff> Jobs (see fig 3.1)
2.Staff Rates - Staff> Tax Tab
3.Site Rates - Clients> Sites>Site Info tab
4.Company Rate - Setups> B.Setups and Defaults> Defaults Tab> Staff tab
If you have no pay rate policy we recommend using Site rates (No. 3).
4. Pay Items & Column Headings
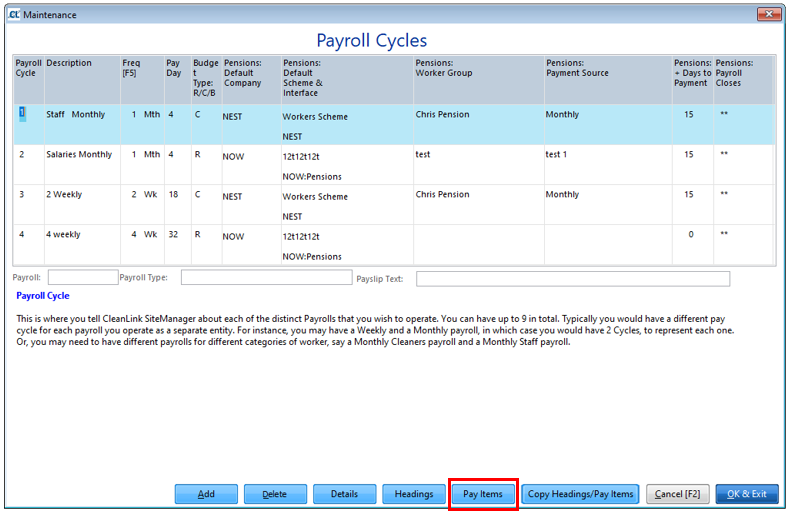
It is possible to set up as many Pay Items as necessary. To do so go to Setups Tab > K. Payroll Cycles > Select Cycle > Pay Items
Use the next screen to set up Fixed or Hourly Pay Items/Deductions as required.
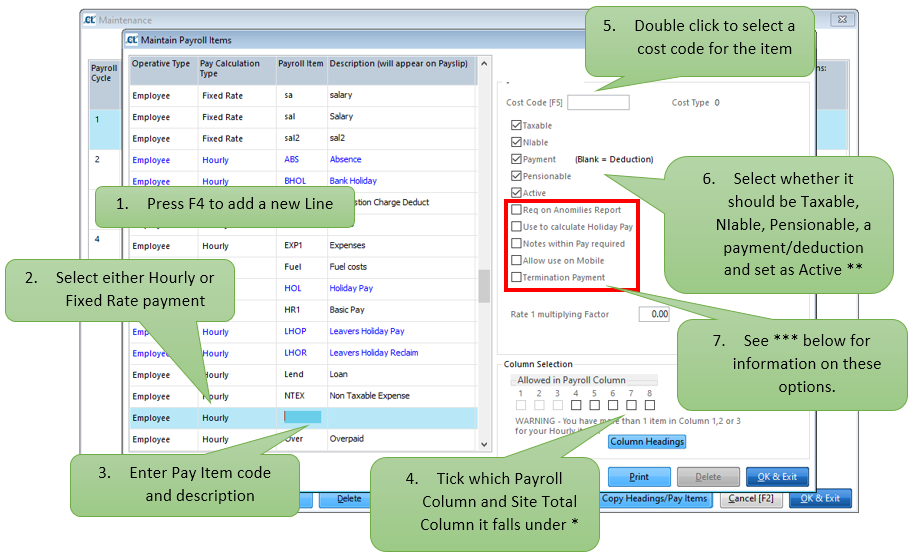
*Payroll and Site Total columns refer to where you enter/see the figures in the Staff/Site pay. Use the column Headings button to show your current column setup. There are eight pay columns, the eighth column is reserved for holidays, SSP, SMP, SAP & OPP. These eight columns are consolidated into 4 Site columns in regular pay and cycle pay.
**All Pay Items you want to use must be set as “Active”. If it is a deduction you should not tick “Payment”. Any payments/deductions that go against Net Pay only would not be ticked as Taxable, NIable and Pensionable.
***
Req on Anomalies Report: Ticking this option will include an entry for every instance of this Pay Item in the Anomalies and Summary Report produced at the point of calculating a pay cycle.
Use to Calculate Holiday Pay: This marks an item as being part of an employee’s pay that will be included when calculating accrued holiday pay.
Notes within Pay Required: Marks an item as requiring a note when included in an employee’s pay.
Allow Use on Mobile: Makes the selected pay item available to mobile users when using Mobile Timesheets.
Termination Pay: Marks an item as specifically being used for Termination Pay and thus subject to different Tax and NI calculations to regular pay.
Please Note It is essential that only Pay Item REG1 is used in columns 1-3. Adding another pay item in these columns will cause problems within the cycle.
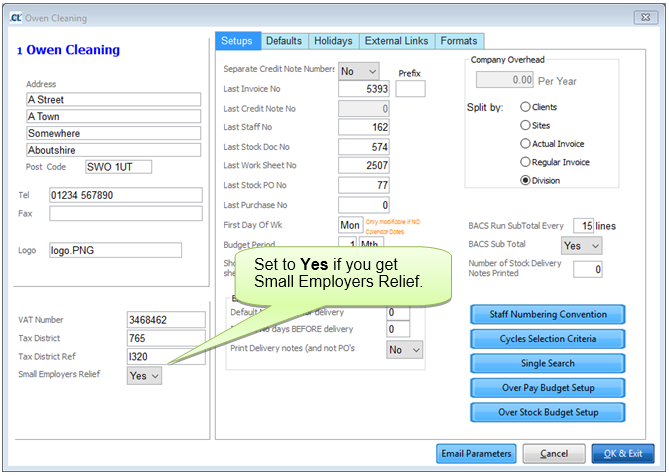
There is a field in Setups > Setups & Defaults, Small Employers Relief, when set, the system will automatically calculate the Maternity/Paternity benefits and compensation you can claim as part of being a small employer.
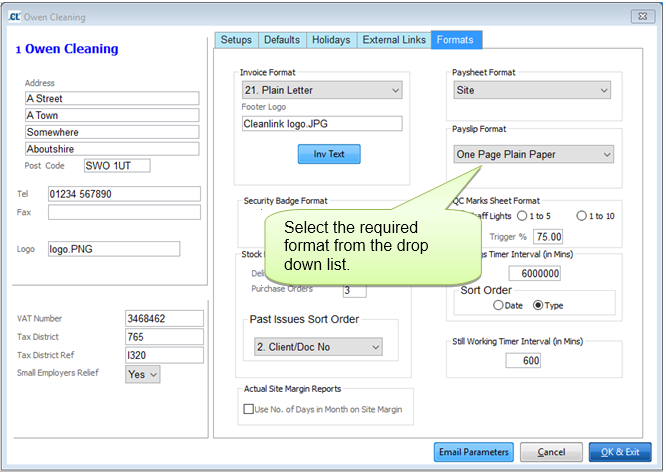
Cleanlink has multiple payslip formats available. These include plain paper, pre-printed and security formats.
The payslip format can be selected through the ‘Setups’ tab by going to: Setups > 2. Setups and Defaults > Formats
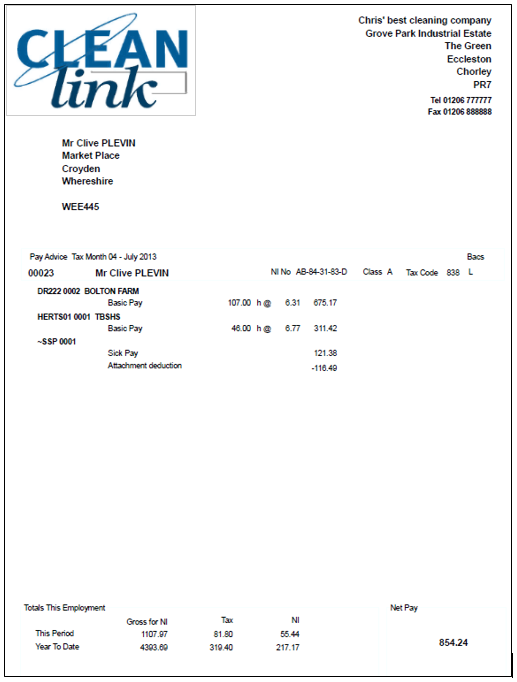
Payslips that are emailed or uploaded to the CleanLink Portal will be sent using the One Page Plain Paper Format shown below to allow your employees to print it.
Cleanlink has the ability to create BACS files ready to be imported into your BACS software. Within the program there are numerous formats available.
To select the required format go to: Setups Tab > 2. Setups and Defaults > External Links > Change Bank Details

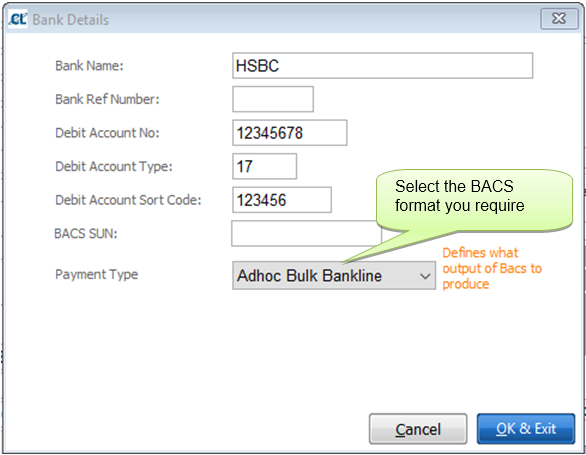
If you are unsure of the format you require we would advise you contact CleanLink Support. If you can provide us with an example of the format you require, we can advise which Payment Type matches it or assist you with creating your own format. See User Defined BACS for more information.
8. Attachment of Earnings Setup
CleanLink Supports 4 type of Attachments – ‘F’ixed, ‘V’ariable, ‘B’anded and ‘D’WP these are set up in Setups > 18.Attachments and Student Loans.
Click on Modify then Add, enter a Type of F, V, B or D, then the description. If it is not a fixed deduction then further information will need to be entered in the rates table. Click on the rates button and enter the rates as provided by the Court.
Fixed
As the name implies a fixed amount is deducted each period.
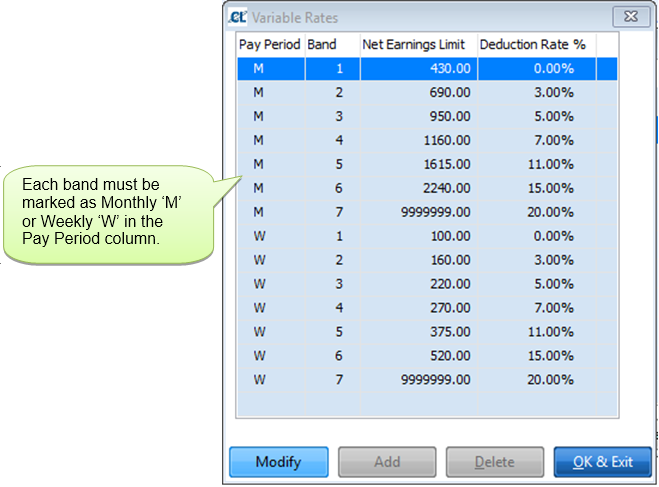
Variable – Generally used by Councils
Below is an example table.
The first band is 0-300 and gives a 0% deduction of net earning’s, 301 - 550 gives a 3.00% deduction and so on. But note – the last band is a special band where for earnings below the start of the band 17% is deducted with 50% being deducted on earnings above the band, eg your earnings are 2500 you would be deducted 17% of £2020 (£343.40) plus 50% of £480 (£240), a total deduction of £583.40
If you have a Monthly and a Weekly or Fortnightly or 4 Weekly Pay Cycle, you must set up both a Monthly and Weekly Pay Period Table as below by marking ‘M’ or ‘W’ in the Pay Period column against each band.
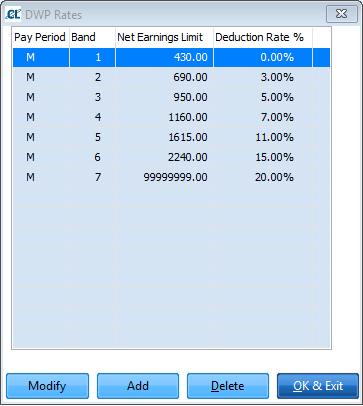
DWP – Used by the Department of Work and Employment
This is similar to a variable attachment except that there is no special upper band. All deductions are based on the percentage set for the band. A sample table is shown below:
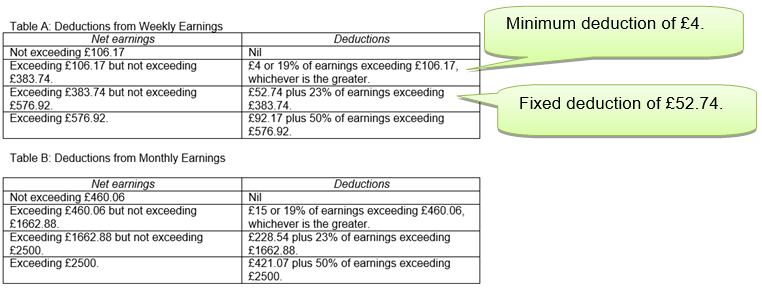
Banded – Generally used by Scottish Courts
This is different to the above two types in that the amount deducted in cumulative. There are also Minimums and fixed amounts for each band
If your earnings fall within Band 2 you will be deducted 19% of your earnings minus the band lower limit, eg if you earnings were £1000 you would be deducted 19% of £539.50 (£102.49). However if your deduction was less than £15 you would be deducted £15.
If your earnings fall within Band 3 you would be deducted 23% of your band earnings plus £228.54, eg your earnings are £2000 you would be deducted 23% of £337.12 (£77.53) plus the £228.54 fixed amount, a total deduction of 306.06.

To add an Attachment of Earnings Order or Student Loan to an employee's record go to Statutory Payments & Deductions section of the help file.
CleanLink uses the 'Exact Percentage Method' to calculate NIC, when comparing calculations to other systems, e.g. Sage who use the 'Table Method', there will be discrepancies. The Inland Revenue accepts both methods.