Setting Up QC for Sites |
  
|
Setting Up QC for Sites |
|
Each Site is unique and therefore QC Site Visits & Audits need to be configured specifically for each site. This includes defining the areas and audit points, and creating and scheduling regular visits.
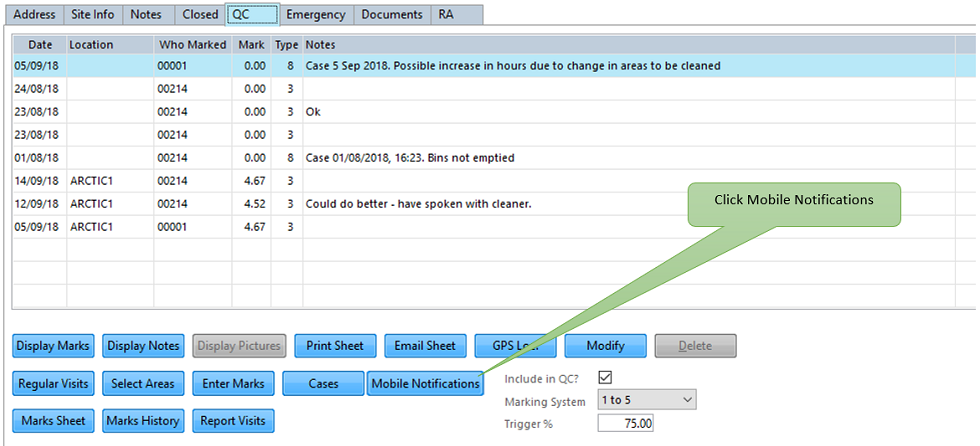
For each Site, go to Client > A. Maintain Site > QC and the screen below will appear:

The Visits/Communications table area shows a history of Visits or Communications relating to the Site. These entries can have been made either through ‘Enter Marks’ (which is the ad-hoc way of creating an audit); 'Responses', which are audits completed in response to a regular visit that has been instructed as part of a QC Cycle, or Cases (Complaints), which have been created using a mobile device.
Include in QC - Include this Site in the Batch marking.
Marking System - Use this to determine the Site's marking system – either Traffic Lights, 1 - 5 or 1 - 10. PLEASE NOTE that the due to a lack of screen space on smaller devices, the Mobile App does not use 1 - 10.
Trigger % – Percentage figure of a Site Audit score that if not achieved, triggers a warning.
Go to Client > A. Maintain Sites > QC. As each Site may require different Audit types and different areas to be inspected, these can be set up using the ‘Select Areas’ button.
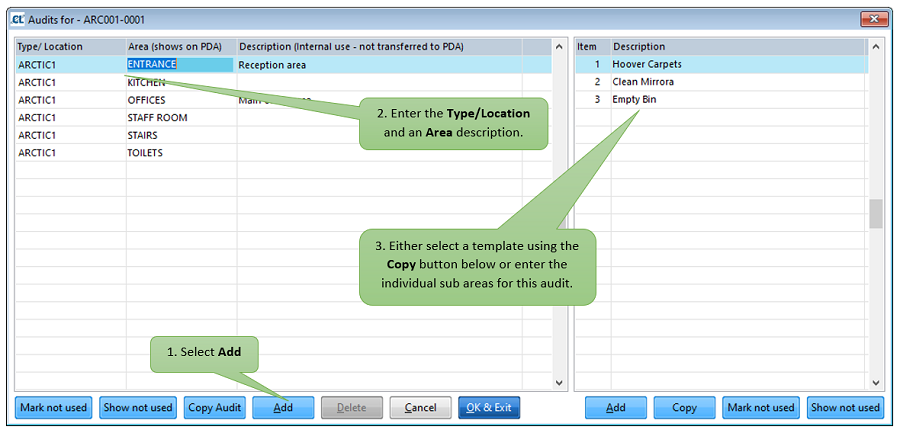
If an audit Type/Location becomes redundant for that site you can use the ‘Mark not used’ button to hide it, as deletion is not allowed (in order to support historic records).
Copy QC Template to Sites
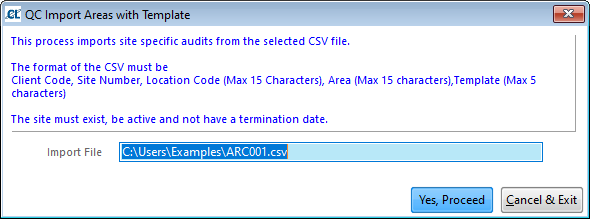
You can also create audits from the templates held under Quality Ctrl > M. Setup Templates using a .csv file. This allows you to create several types of audit at the same time.
First, ensure your templates are set up. Select Quality Ctrl > M. Setup Templates. See Setting Up Site Visit Templates for further details.

Now create and save a .csv file (in Microsoft Excel for example). The format of this file is: Client Code, Site Number, Location (max 15 characters), Area (max 15 characters) and Template Code (max 5 characters).

Go to Quality Ctrl > P. Import Areas (With templates). Press F5 to enter File Explorer. Locate the required .csv file and click OK.

The Type/Location field is used to describe the Audit type or the location where the audit is to be made. For example, you may wish to specify different audit types, such as Health & Safety Audits or Cleaning Audits, or if you are auditing separate buildings/floors at a site. The Type/Location field is used on the Mobile App to display the different types of Audit forms.

The Areas description is also important as it determines the Audit areas shown on the Mobile App. You may even wish to specify floors within this description. Being more specific will give you and your customers a more representative view on where the problem areas are.

Regular Visits are used to send reminders to do inspections/visit site/contact clients to your managers. These reminders can either be printed, emailed or sent to CleanLink’s Mobile App. They are set up in a QC cycle and will repeat as per the schedule you set on the Regular Visit record.
To set up a Regular Visit, go to Client > A. Maintain Sites > Regular Visits.

The instruction / reminder will be added to the selected QC Cycle and the next occurrence will be as you have prescribed. See Running a QC Cycle
Setting up Mobile Notifications
Mobile Notifications give you the ability to automatically send any forms or audits received from mobile devices to a range of recipients such as Area Managers, Clients, or manually added contacts. You can set this up by going to the Site > QC > Mobile Notifications
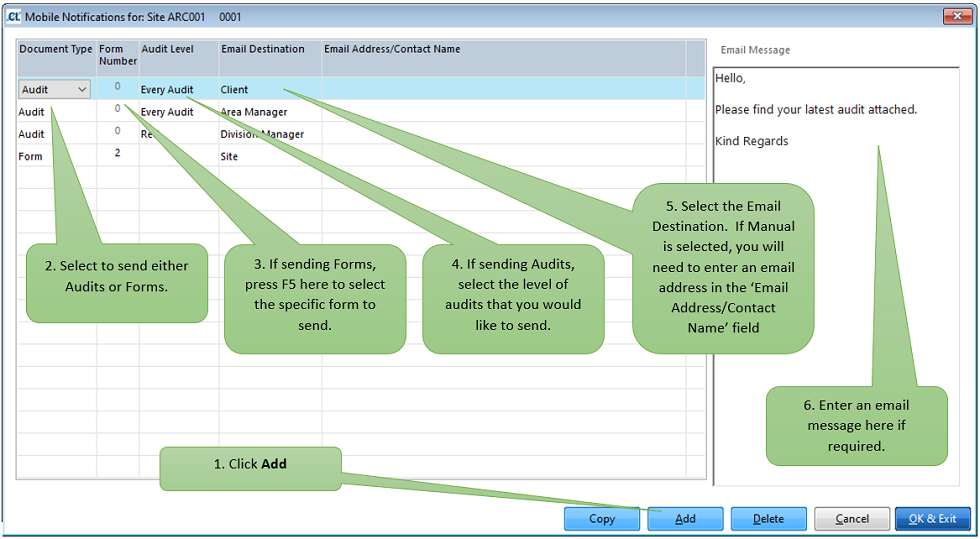
The Copy button at the bottom of the Mobile Notifications screen enables you to copy the currently selected notification from an existing record over to a selected range of active Clients/Sites.